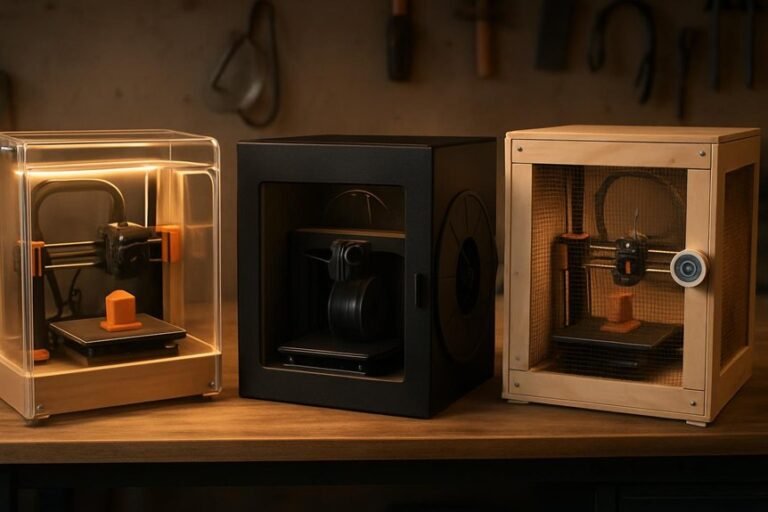
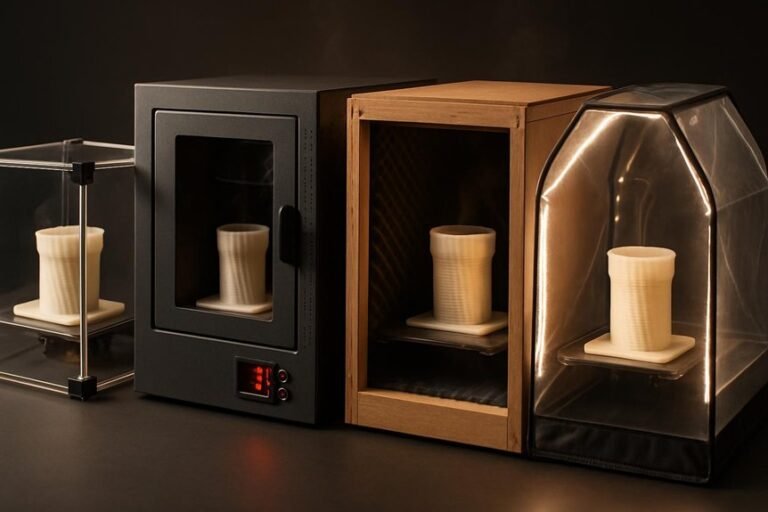
If you want cleaner, stronger prints from your Ender 3, an enclosure can make a big difference by keeping temperatures steady, cutting noise, and protecting prints from drafts and dust. I’ll walk you through five top enclosures in 2026 that balance safety, ease of use, and value—each one fits different setups and priorities like noise reduction, flame-retardant materials, or quick assembly—so you can pick the best match for your space and projects.
YOOPAI 3D Printer Enclosure Dustproof Constant Temperature Protective Cover for Creality and Anycubic Printers
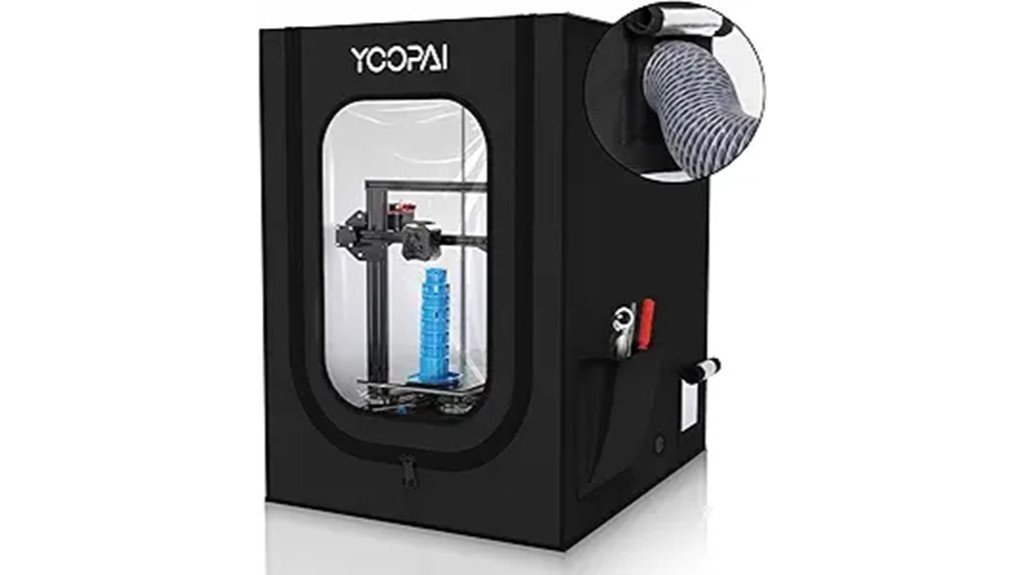
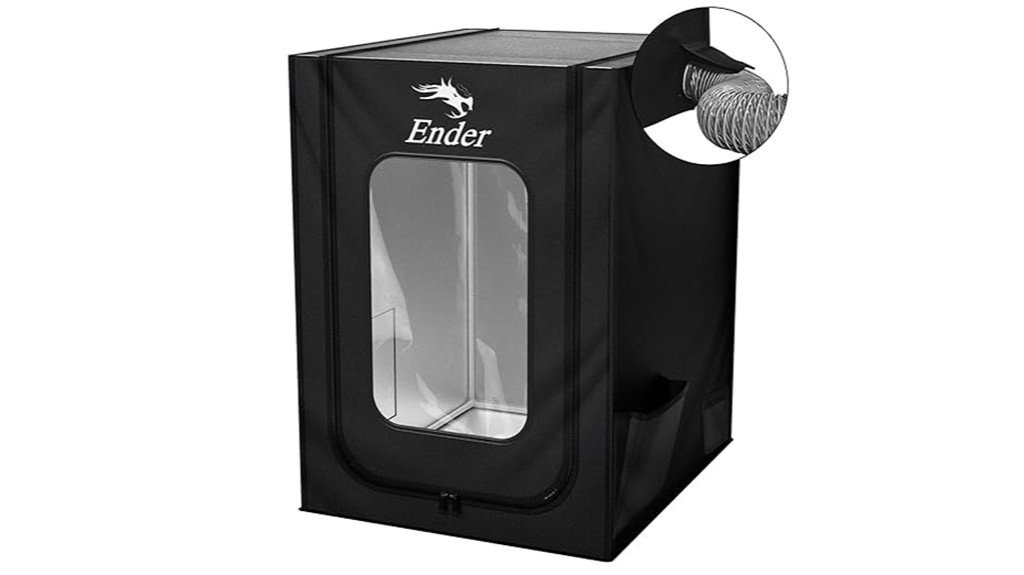
If you’re printing with an Ender 3 (or a similar Creality or Anycubic machine) and want a quick, affordable way to cut drafts and keep temps steady, the YOOPAI enclosure is a solid pick — it’s made to fit the whole Ender 3 family and assembles in about five minutes. You’ll get a dustproof cloth cover, fiberglass rods, and mounting bits that keep heat steady and reduce noise. It’s lightweight but stable, fits larger printers, and has ports for fans and filament feed. Reviews praise temp control and odor reduction, though instructions and rod handling can be tricky.
Best For: Makers and hobbyists using Creality Ender 3 or similar Creality/Anycubic printers who want a quick, affordable way to reduce drafts, stabilize print temperature, and cut noise.
Pros:
- Quick, tool-free assembly (about 5 minutes) and easy disassembly for relocation.
- Provides dustproofing, improved temperature stability, and reduced odors/noise for better print consistency.
- Lightweight yet stable design with ports for fan exhaust and filament feed; fits the full Ender 3 family.
Cons:
- Instructions are often unclear, making initial assembly fiddly for some users.
- Fiberglass rods can be tricky to handle and may splinter if not installed carefully.
- Requires a surface area of at least ~30 inches depth and may be too large for smaller workspaces.
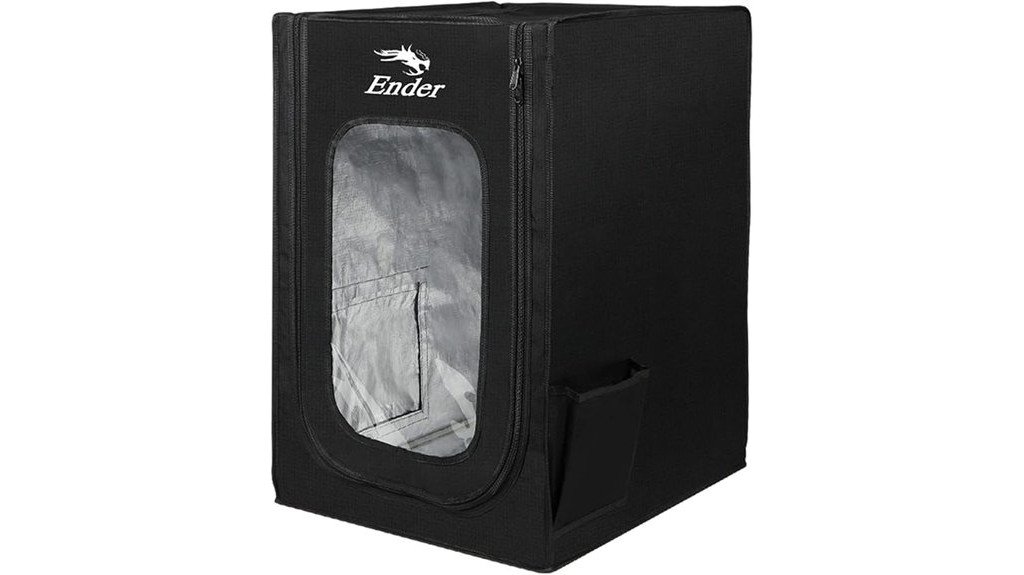
Creality 3D Printer Enclosure (Compatible with Ender 3 Series)
The Creality 3D Printer Enclosure is a great pick when you need steady temperatures and better odor control for your Ender 3, especially if you print in a cold garage or a shared room where smells matter. You’ll get a fireproof, dustproof chamber sized 18.89”x23.62”x28.34” that holds heat and keeps prints consistent in chilly or humid spaces. It uses flame-retardant materials and aluminum film, so it melts rather than ignites, and zippers let you peek while printing. Assembly can be tight—waxing rod ends helps—and users praise quieter operation and fewer dust problems overall.
Best For: users of the Creality Ender 3 series (including Ender 3 Pro) who print in cold or shared spaces and need improved temperature stability and odor/dust control.
Pros:
- Provides a fireproof, dustproof chamber (18.89”×23.62”×28.34”) that stabilizes temperature for more consistent prints.
- Reduces noise and contains odors, making it suitable for shared rooms or garages.
- Foldable design with zippers and glass-fiber support rods for observation and compact storage.
Cons:
- Assembly can be challenging due to tight tolerances; zipper quality may be inconsistent.
- May require additional space or modification for larger models or accessories (e.g., heaters).
- Materials melt rather than ignite (safer), but users should still monitor heated enclosures for safety.
Creality 3D Printer Enclosure (550×650×750mm) for Ender/3 V3/3 S1 Series
For hobbyists who want steady, high-temperature prints without fuss, the Creality 550×650×750mm enclosure is a solid choice—think of it as a climate shell for your Ender that keeps things consistent. You’ll find it fits Ender-3 V3, V3 SE, V3 KE, S1 models, and several other Creality printers. The flame-retardant aluminum cloth keeps heat in, blocks dust, and resists corrosion. A fan interface lets you attach a smoke exhaust kit to cut odors and improve air quality. It has a big clear window, tool bag, and folds flat for storage. Assembly’s tool-free and users report better bed adhesion.
Best For: Hobbyist and small-studio Creality owners (Ender-3 V3/V3 SE/V3 KE, S1 series, Ender-5, CR-6 SE, etc.) who want more consistent high-temperature prints, improved bed adhesion, and a cleaner printing environment.
Pros:
- Maintains a stable internal temperature to reduce warping and improve bed adhesion for high-temp prints.
- Flame-retardant, waterproof, and dust-proof aluminum-foil cloth construction protects the printer and prints.
- Fan interface for an optional smoke-exhaust kit, large transparent window for monitoring, tool bag included, and tool-free folding assembly for easy storage.
Cons:
- Smoke exhaust kit sold separately, so odor/filtration requires additional purchase.
- May be cramped for some printer models or setups, causing space constraints or cable routing issues.
- Some users report occasional filament-clogging issues when using high-temperature enclosed environments (requires tuning).
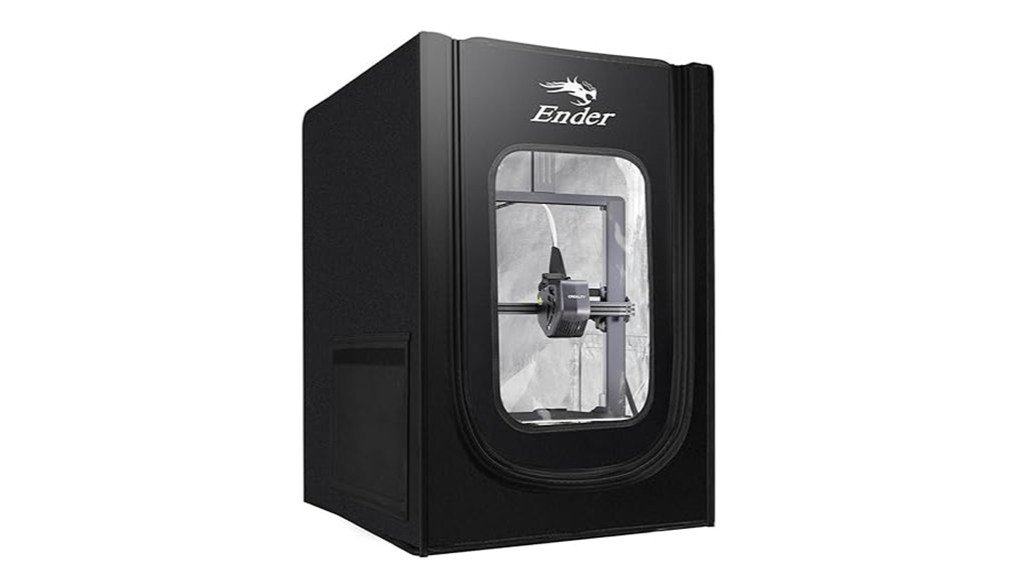
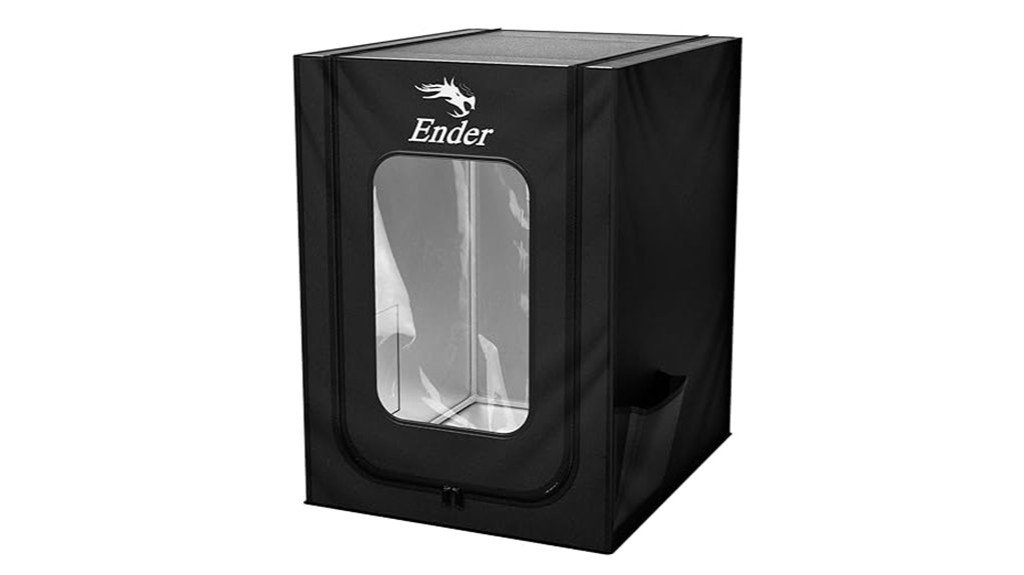
Creality Ender 3D Printer Enclosure Protective Tent for Ender 3 Series
Makers who want steadier prints with less warping will like the Creality Ender 3D Printer Enclosure, a lightweight protective tent designed specifically for the Ender 3 series and similar printers. You’ll find it fits many models, is easy to set up, and keeps your build area warmer and more stable, which helps with bed adhesion and high-temp filaments. The flame-retardant materials, aluminum film panels, and glass fiber rods add safety and rigidity, while reserved pockets and clear panels make monitoring simple. Reviewers praise quieter, cleaner prints and quick assembly; some wish it had internal lighting, but performance is strong.
Best For: makers using Ender 3-series or similar desktop FDM printers who want improved print stability, reduced warping, and a safer, quieter print environment.
Pros:
- Compatible with many Ender 3 variants and similar models; easy, quick installation.
- Helps maintain a stable, warmer build environment for better bed adhesion and high-temp filament printing.
- Flame-retardant, dustproof construction with rigid aluminum film panels and glass-fiber/iron supports for safety and durability.
Cons:
- No built-in internal lighting (users often request better visibility).
- Lightweight tent design may feel less robust than full metal enclosures for heavy-duty use.
- Limited to printers that fit its dimensions (480 x 600 x 720 mm); not suitable for larger machines.
Creality 3D Printer Enclosure (480×600×720mm) for Ender 3 Series
If you want a simple, reliable way to print ABS or keep prints stable in colder rooms, the Creality 3D Printer Enclosure (480×600×720mm) is a smart pick — especially if you own any Ender‑3 variant. It fits Ender‑3 models and similar printers, holds heat to reduce warping, and boosts bed adhesion so your parts come out more consistent. The flame‑retardant aluminum cloth is dustproof, waterproof, and resists high temperatures, while a clear window lets you watch prints. You’ll assemble it in under ten minutes using fiberglass rods (watch for splinters), and many users praise improved ABS results and odor containment.
Best For: users of Ender‑3 series or similar small FDM printers who want a quick, affordable way to print ABS or improve print consistency in cold or drafty rooms.
Pros:
- Maintains a warm, stable build environment to reduce warping and improve bed adhesion for ABS and other temperature-sensitive filaments.
- Flame‑retardant, waterproof, and dustproof aluminum‑foil cloth with a clear window for easy monitoring and better odor containment.
- Quick, tool‑free assembly (under 10 minutes) using lightweight fiberglass rods; includes a tool bag for accessories.
Cons:
- Heat creep can still affect PLA; may require filament changes or additional cooling strategies.
- Fiberglass rods can splinter during assembly—care needed when handling.
- Limited to small printers (fits Ender‑3 sizes); not suitable for larger printers or enclosures needing active temperature control.
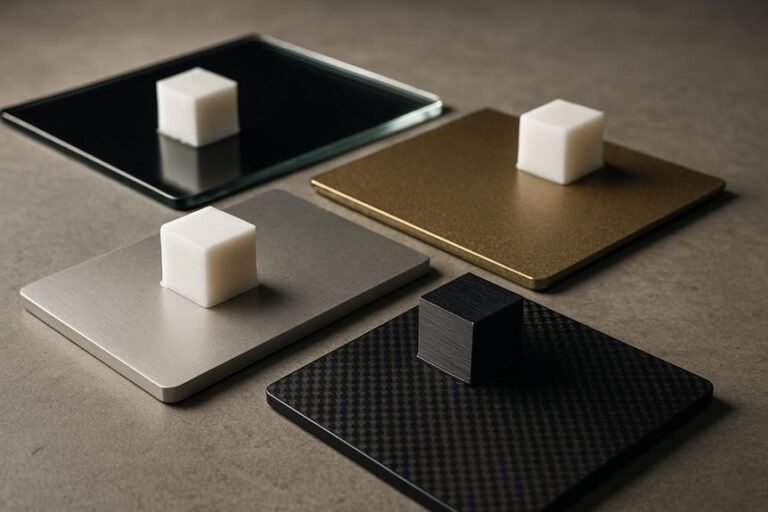
Factors to Consider When Choosing Enclosures for Ender 3
When you pick an enclosure for your Ender 3, you’ll want to think about size and fit first so the printer and any upgrades have room to breathe. Pay attention to temperature control, materials and safety, and ventilation options because they affect print quality and how safe the setup is, and some enclosures also help cut noise and add insulation. I’ll walk you through each factor in plain terms so you can choose something that matches your space, budget, and printing habits.
Size and Fit
Because a snug fit can make the difference between a tidy workspace and a frustrating setup, you’ll want to start with the enclosure’s size and fit before anything else. Measure your Ender 3 including any upgrades, then pick an enclosure whose interior exceeds those dimensions; a minimum surface depth of 30 inches is recommended so the printer sits stable and you can move parts freely. Check height and width carefully — different Ender 3 models vary — and confirm compatibility, since some enclosures are model-specific. Make sure you can access the printer easily for maintenance and monitoring, with doors or clear panels. Finally, allow extra room for accessories like smoke exhaust kits or filament feeders so nothing feels cramped during use.
Temperature Control
Although it might seem like a small detail, keeping a steady temperature inside your Ender 3’s enclosure can make a huge difference in print quality and reliability, so you’ll want to think through how the enclosure manages heat. A well-designed enclosure holds a constant warmth, which helps bed adhesion and reduces warping—especially when you’re printing higher-temp materials like ABS. That steady thermal environment improves dimensional accuracy and surface finish, so parts come out truer to your design. Consistent heat also prevents sudden failures from drafts or room temperature swings that sneak in mid-print. Look for enclosures with ventilation options or fan interfaces so you can control heat, clear fumes, and keep air quality decent without losing the steady internal temperature your prints need.
Material and Safety
You’ve seen how holding a steady temperature helps print quality, and now let’s look at the gear that makes that safe and reliable. Choose flame-retardant materials, like aluminum foil cloth, so a stray failure won’t turn into a fire. You’ll want high-temperature resistance so the enclosure won’t warp or off-gas when the printer and filament heat up. Waterproof and dustproof panels keep particles and spills away, which keeps parts moving smoothly and prints consistent. Build with stable supports—fiberglass rods, for example—to reduce vibration that can blur detail. Finally, check for safety certifications and flame-resistance test results before you buy; they’re the proof the enclosure was vetted for real-world printing, not just marketing.
Ventilation Options
When you want consistent prints and safer air in your workspace, choosing an enclosure with good ventilation makes a big difference, and it’s easier to get right than you might think. Look for enclosures that include fan interfaces or openings for smoke exhaust kits so you can pull fumes away and keep air quality healthy. Adjustable ventilation controls are a huge plus — you can dial airflow up for PLA prints or reduce it when holding heat for ABS. Proper airflow also helps prevent overheating and keeps the chamber temperature steady, which lowers warping and improves bed adhesion. Think about where fans mount, how easy filters and ducts are to clean, and whether the venting lets you balance fresh air with stable print temps.
Noise and Insulation
If you’re working in a shared space or want a quieter home office, the right enclosure can make your Ender 3 much less noisy while also helping keep temperatures steady. Enclosures contain sound, so you and neighbors hear fewer printer whirs and clicks; users often say this makes the whole printing experience more pleasant. Look for models with sound-dampening panels or foam liners—those materials cut mid and high frequencies effectively. At the same time, good insulation helps maintain a consistent internal temperature, reducing print failures from drafts or room swings. Size and ventilation matter: a tightly sealed box isolates noise better but needs planned airflow so heat stays stable without overheating. Pick an enclosure that balances damping, thermal insulation, and smart venting for quiet, reliable prints.
Ease of Assembly
Because a hassle-free setup gets you printing faster, ease of assembly should be near the top of your checklist when choosing an Ender 3 enclosure. Look for models that go together quickly — some finish in under 10 minutes and need no extra tools, which is great if you’re new to 3D printing. Clear, step-by-step instructions make a big difference, though tight tolerances on parts can still be frustrating; a little wax on rod ends often helps them slide in smoothly. Sturdy fiberglass rods give stability, but handle them carefully to avoid splinters. Foldable designs add convenience when you want to stow the enclosure, and transparent windows plus easy-access doors let you monitor prints right away after setup, keeping things safe and simple.
Portability and Storage
Although enclosures are meant to sit around your printer, you’ll appreciate models that won’t hog your workspace when you need the table back. Look for foldable designs that collapse flat for storage; they save room and make your garage or desk feel less crowded. Lightweight enclosures, around 3.5 to 3.65 pounds, let you lift and carry the whole setup without calling for help, which is handy if you move between rooms. Quick assembly in under 10 minutes means you can set up or pack away fast, and fast disassembly helps when you need to relocate. Sturdy construction keeps vibrations down, so your prints stay steady even when you move the enclosure. These features together make your printer setup flexible and practical.
Accessibility and Visibility
You’ve already thought about size and how easy an enclosure is to move or store, but you’ll also want to make sure you can see and reach your printer while it’s running. Large transparent windows are a huge help — you can watch layers form without opening the box and letting heat escape. Zippers or easy-access doors let you peek in, tweak a setting, or remove a problem print fast. Some enclosures give multiple viewing angles, which is handy when your workspace forces you to move around. Built-in tool pockets keep tweezers, scrapers, and spare nozzles at hand so you don’t hunt mid-print. Finally, pick a model that’s simple to assemble and disassemble so relocation or storage doesn’t turn into a weekend project.
FAQ
Can an Enclosure Improve PETG and ABS Layer Adhesion Reliably?
FAQ 1: How does an enclosure improve layer adhesion for PETG and ABS?
An enclosure helps maintain stable and elevated ambient temperatures, which enhances layer adhesion. This minimizes issues like warping and delamination during the printing process.
FAQ 2: What temperatures do enclosures typically maintain for optimal adhesion?
Enclosures generally maintain temperatures above room temperature, ideally between 60°C to 80°C, depending on the material used. This warmth allows for better melting and bonding of layers.
FAQ 3: Can an enclosure prevent warping in 3D prints?
Yes, an enclosure significantly reduces the risk of warping by keeping the temperature consistent around the print. This is particularly important for materials like ABS that are prone to warping.
FAQ 4: Is it necessary to control ventilation in an enclosed print area?
Yes, controlling ventilation is crucial to ensure that parts cool evenly and to avoid overheating sensitive components. Proper airflow can also prevent trapped heat from causing print defects.
FAQ 5: What is the impact of overheating components in an enclosure?
Overheating can lead to failures in electronic components and can negatively affect print quality. It’s essential to monitor temperatures within the enclosure to prevent damage.
FAQ 6: How does part cooling affect layer adhesion?
Proper part cooling is necessary to ensure that each layer solidifies correctly without excessive heat retention. However, cooling should be balanced to avoid cooling too quickly, which may lead to cracks or warping.
FAQ 7: Are there specific enclosures recommended for PETG and ABS printing?
While there are many types of enclosures available, selecting one that can maintain high temperatures and has good insulation properties is key. Look for designs that allow for easy access and monitoring.
FAQ 8: Can using an enclosure reduce print failure rates?
Yes, by providing a controlled environment, enclosures can significantly decrease print failure rates associated with temperature fluctuations and environmental factors. This leads to more reliable and consistent prints.
FAQ 9: Do all 3D printers benefit from using an enclosure?
Not all printers require an enclosure; however, those designed for high-temperature materials like ABS and PETG will benefit the most from one. It’s important to evaluate the material and printer specifications.
FAQ 10: How can I ensure the best results when using an enclosure?
To achieve the best results, monitor the internal temperature, control airflow, and ensure that the print environment is free from drafts. Regularly check for any overheating issues and adjust settings as needed.
Will Enclosures Cause Heat-Related Stepper Motor Failure?
1. Can enclosures cause stepper motor overheating?
Yes, enclosures can lead to overheating if not properly managed. However, with adequate temperature control measures, this risk can be mitigated.
2. What are effective ways to manage temperatures within an enclosure?
To manage temperatures, ensure proper airflow, incorporate ventilation or fans, and regularly monitor motor temperatures. These steps help prevent overheating.
3. How can I ensure proper airflow in an enclosure?
You can ensure proper airflow by designing the enclosure with vents or openings and positioning fans strategically to promote circulation.
4. What role do fans play in preventing stepper motor overheating?
Fans help dissipate heat by improving air circulation within the enclosure, which can significantly reduce the risk of overheating for stepper motors.
5. How can I monitor the temperature of stepper motors?
You can monitor motor temperatures using thermocouples or infrared temperature sensors, which provide real-time data to prevent overheating.
6. What are the manufacturer limits for stepper motor temperatures?
Manufacturers typically provide specific temperature limits for their motors, which should be adhered to in order to maintain performance and reliability.
7. What happens if enclosure temperatures exceed manufacturer limits?
Exceeding manufacturer temperature limits can lead to thermal stress, reduced performance, and potential failure of the stepper motors.
8. Are there specific types of enclosures that are better for stepper motors?
Enclosures designed with thermal management features, such as built-in cooling systems or materials that dissipate heat efficiently, are better suited for stepper motors.
9. Can I use heat sinks with stepper motors in an enclosure?
Yes, using heat sinks can enhance heat dissipation from stepper motors, helping to maintain safer operating temperatures within an enclosure.
10. What should I do if my stepper motors are overheating despite precautions?
If overheating occurs, reassess airflow, check fan functionality, and consider reducing the enclosure temperature or increasing ventilation to enhance cooling.
How Do Enclosures Affect Filament Spool Drying/Moisture?
FAQs on Enclosures and Filament Spool Drying
1. How do enclosures affect filament moisture levels?
Enclosures help control humidity around the filament, keeping it drier during printing. However, they do not eliminate moisture from spools that are already wet.
2. Can enclosures completely dry wet filament spools?
No, enclosures cannot fully dry spools that have already absorbed moisture. For effective drying, additional methods are needed.
3. What methods are recommended for drying moist filament?
A filament dryer or desiccant can be used to remove moisture from spools effectively. These methods are more efficient than relying solely on an enclosure.
4. Is it safe to use filaments in an enclosure with high temperatures?
It is essential to monitor the temperature inside the enclosure to prevent softening of sensitive materials. High temperatures can damage certain filaments.
5. How does humidity affect filament performance during printing?
High humidity can lead to poor print quality, including issues like stringing or bubbling. Keeping filaments dry is crucial for optimal performance.
6. What is the ideal humidity level for storing filament spools?
Ideally, filament spools should be stored in a low-humidity environment, generally below 15-20% relative humidity, to maintain their quality.
7. Should I use desiccants even with an enclosure?
Yes, using desiccants alongside an enclosure can enhance moisture control, especially for spools that have previously absorbed moisture.
8. How can I monitor the effectiveness of my enclosure?
Consider using a hygrometer to measure humidity levels inside the enclosure. This will help you assess whether your setup is maintaining a dry environment.
9. What types of filaments are most sensitive to moisture?
Nylon, PETG, and certain composite filaments are particularly sensitive to moisture and can degrade in quality if not stored properly.
10. Can I rely solely on an enclosure for long-term filament storage?
While enclosures provide some moisture protection, it’s best to combine them with drying methods for long-term storage, especially for sensitive filaments.
Can I Use Enclosure Lighting Without Raising Internal Temps?
1. Can I use enclosure lighting without increasing temperatures significantly?
Yes, it’s possible to use enclosure lighting while keeping internal temperatures low by selecting appropriate lighting options and placement.
2. What type of lighting is best for minimizing heat?
Low-heat LED lights are ideal as they emit less heat compared to traditional lighting options, helping to maintain a stable internal temperature.
3. How should I position the lights in the enclosure?
Position lights away from sensitive areas and equipment to prevent localized heating and ensure even light distribution.
4. Can reflective surfaces help in managing heat?
Yes, adding reflective surfaces can enhance light efficiency and minimize the need for higher wattage lights, which in turn helps in controlling heat.
5. What should I do if temperatures start to rise?
Monitor the internal temperatures closely; if they exceed desired levels, consider switching to lower wattage lights or implementing a timed lighting schedule.
6. Is it necessary to monitor temperatures regularly?
Regular temperature monitoring is essential to ensure that lighting adjustments are effective and to prevent potential overheating in the enclosure.
7. Are there specific wattage limits I should follow?
While it varies based on the enclosure size and setup, using lower wattage lighting generally helps in managing heat levels more effectively.
8. Can I use traditional bulbs in enclosures?
It’s advisable to avoid traditional incandescent or halogen bulbs, as they generate more heat, which can raise internal temperatures.
9. What are the advantages of using LED lights over other types?
LED lights are energy-efficient, have a longer lifespan, and produce significantly less heat compared to incandescent or fluorescent lights.
10. Should I use a timer for my enclosure lights?
Using a timer can help manage the duration of light exposure and minimize heat buildup, allowing for better temperature control in the enclosure.
Are Enclosures Compatible With Auto Bed Leveling Sensors?
FAQ on Enclosures and Auto Bed Leveling Sensors
1. Can I use an enclosure with my auto bed leveling sensor?
Yes, enclosures can be used with auto bed leveling sensors, provided that certain conditions are met.
2. What should I ensure about the probe paths of my sensors?
It’s important to guarantee that the sensors have clear probe paths to ensure accurate readings during the leveling process.
3. How can thermal distortion affect my sensor’s performance?
Excessive heat within an enclosure can cause thermal distortion, which may lead to inaccurate leveling and print issues.
4. What is the best way to mount my auto bed leveling sensor?
Mounting the sensor securely or shielding it can help maintain stable wiring and signal integrity throughout the printing process.
5. Do enclosures influence the calibration of auto bed leveling sensors?
Yes, enclosures can influence calibration if they create heat buildup or obstruct the sensor’s probe path.
6. Can excessive heat inside the enclosure damage the sensor?
While the sensor itself may not be damaged, excessive heat can affect its performance and accuracy, impacting your prints.
7. Should I modify my enclosure for better sensor performance?
Modifications, such as adding ventilation or adjusting sensor placement, can enhance performance and accuracy when using enclosures.
8. Do I need to recalibrate my sensor after adding an enclosure?
It’s recommended to recalibrate your sensor after adding an enclosure to ensure optimal performance and accurate leveling.
9. What materials are best for shielding my sensor in an enclosure?
Use non-conductive materials that can effectively shield the sensor from heat, while maintaining accessibility for adjustments.
10. Are there specific enclosures designed for printers with auto bed leveling sensors?
While not all enclosures are specifically designed for this purpose, many models can be adapted to accommodate auto bed leveling sensors effectively.
Final Thoughts
When it comes to choosing the best enclosure for your Ender 3, you need to prioritize what truly matters: warmth, noise reduction, and safety. Don’t settle for anything less than a solid fit for your space and budget. For beginners, a YOOPAI or Creality tent is an excellent starting point, offering essential protection and control. If you’re working with ABS or tackling larger prints, invest in a more robust framed enclosure that provides superior temperature stability.
Always factor in ventilation, the use of flame-retardant materials, and the ease of access for maintenance—these elements are critical for both performance and safety. With the right enclosure, you will experience significantly fewer warps, achieve cleaner finishes, and create a more serene workspace. Make your choice wisely, and you’ll see the difference in your prints.