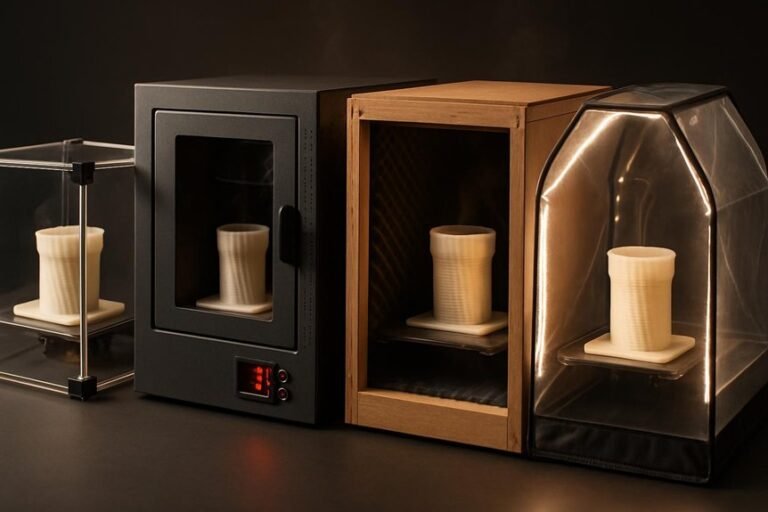
If you print at home or in a small shop, you’ll want an enclosure that keeps temps steady, filters fumes, and cuts noise without breaking the bank. I’ll walk you through five top enclosures for 2026, from compact cabinets to roomy resin tents, showing what each does best and who it’s for. You’ll find practical tips to match an enclosure to your printer and workspace — and one choice might change how you print.
3D Printer Enclosure Cabinet with Ventilation, Thermo-Hygrometer, and LED Light (Fits up to 23W x 22.4D x 25.4H)
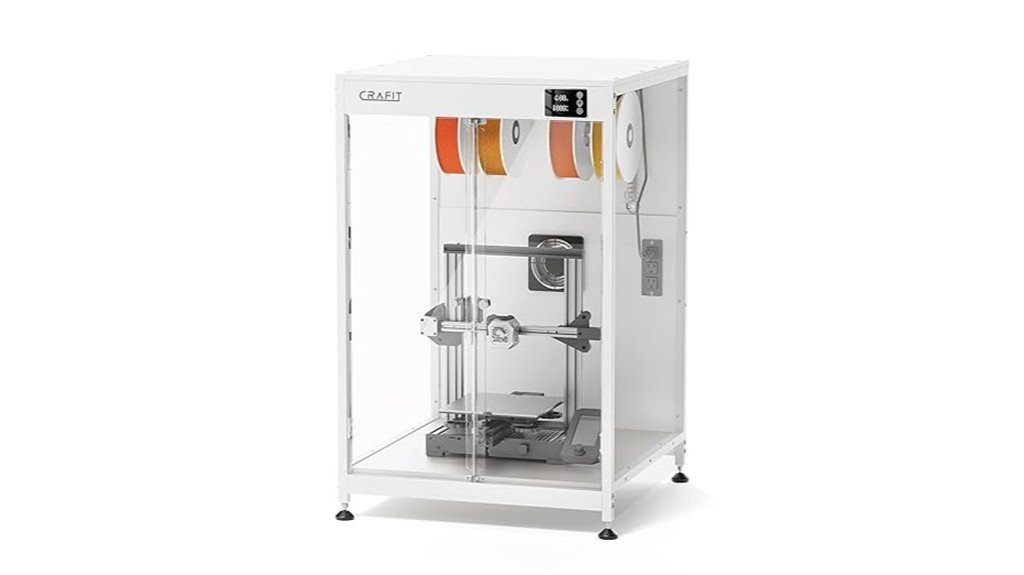
If you want a simple, all-in-one enclosure that keeps prints consistent and your workspace tidy, this cabinet is a solid pick — think of it as a climate-controlled home for printers up to 23″ x 22.4″ x 25.4″. You’ll get a thermo-hygrometer that lets you watch temperature and humidity, an LED light for clear viewing, and a manual exhaust fan to clear fumes when needed. The carbon-steel frame and PET panels cut noise and stabilize conditions so you’ll see fewer warped prints. Assembly’s straightforward, the windows show progress nicely, and it’s stylish—though some parts feel budget-minded.
Best For: makers and hobbyist 3D-printer users who want a simple, climate-controlled enclosure to reduce warping, cut noise, and keep prints and workspace tidy for printers up to 23″ x 22.4″ x 25.4″.
Pros:
- Provides temperature and humidity monitoring plus LED lighting for better print consistency and visibility.
- Manual exhaust fan and PET panels help manage fumes and reduce operational noise (up to ~40%).
- Sturdy carbon-steel frame and easy assembly with panoramic windows for unobstructed viewing.
Cons:
- Some components feel budget-minded (pressboard back panel, thinner acrylic/PET) which affects perceived value.
- Occasional quality-control and packaging issues reported (bent parts, protective film hard to remove).
- Manual exhaust fan only (no automated ventilation) and limited to printers that fit the stated dimensions.
Large Resin 3D Printer Enclosure with Ventilation Kit and LED Light

This large resin 3D printer enclosure is a great pick for hobbyists or small studios who run one or two LCD resin printers and want to cut fumes, dust, and noise without sacrificing visibility or print quality. You’ll get roomy internal dimensions (30 x 19.7 x 28.3 inches), a perspective PVC window for watching prints, and a sealed design that guards against dust and splashes. A carbon filter sheet and exhaust fans push odors out through expandable ducts, though some users upgraded fans for stronger extraction. Assembly can be confusing, but it’s sturdy, insulated for stable temps, and generally well liked.
Best For: hobbyists or small studios who run one or two LCD resin 3D printers and want to reduce fumes, dust, and noise while maintaining visibility and print quality.
Pros:
- Roomy interior (30 x 19.7 x 28.3 in) fits one or two resin printers and offers good working space.
- Sealed design with PVC viewing window, internal insulation, and carbon filter sheet improves cleanliness, temperature stability, and visibility.
- Includes exhaust fans, expandable ducts, and LED lighting for ventilation and monitoring.
Cons:
- Stock fans and filter may be insufficient for strong fume extraction; some users upgrade fans or duct to a window.
- Assembly instructions can be confusing and may require extra effort to set up or disassemble.
- Filter can become obstructed and overall unit is relatively pricey for some buyers.
3D Printer Enclosure with LED Lighting for Creality Ender 3 and Similar Printers

For anyone who wants cleaner, safer, and easier prints on a Creality Ender 3 (or a similar-sized machine), the 3D Printer Enclosure with LED Lighting is a smart pick — think of it as a compact workshop upgrade that fits right over your printer. You’ll get brighter visibility from the built-in LED strip, so you can spot jams or layer shifts even in dim rooms. The fireproof, dustproof tent keeps temperatures steady for better print quality, cuts noise, and reduces vibrations. It’s quick to set up in about five minutes, works with many Creality and Anycubic models, and feels durable.
Best For: hobbyists and small workshop users of Creality Ender 3 and similar-sized printers who want improved print quality, safety, and visibility in a compact, easy-to-install enclosure.
Pros:
- Built-in LED strip provides clear lighting for monitoring prints and spotting issues quickly.
- Fireproof, dustproof design and temperature stabilization improve print reliability and safety.
- Quick 5-minute assembly, compatible with many Creality and Anycubic models, and reduces noise/vibrations.
Cons:
- Only fits printers smaller than 29.5 × 25.6 × 21.6, limiting use with larger machines.
- Tent-style enclosures may offer less insulation/control than rigid enclosures for advanced materials.
- Fabric components could wear over time and may require replacement or careful handling.
VEVOR 3D Printer Enclosure (Transparent Acrylic, Ventilated, LED)
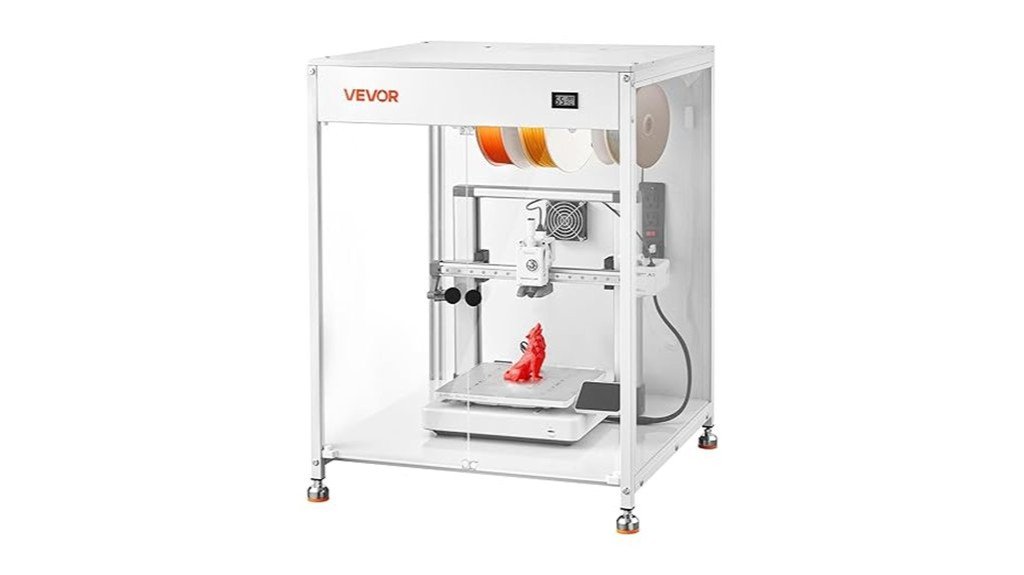
You’ll appreciate the VEVOR 3D Printer Enclosure most if you want a simple, visible way to keep prints stable and clean—especially when you’re working with Bambu Lab, Ender, Neptune, or Kobra machines. It fits many models (A1, Ender3 V3, V2, S1 Pro, Neptune 4 Pro, Kobra2 Pro) and measures 23.6 x 23.6 x 31.5 inches. The acrylic panels give great visibility, LED lighting helps in low light, and the ventilated design expels smoke and dust for safer printing. Assembly is straightforward with clear instructions, and users praise stability, though the fan runs about 52 dB, which can be noisy.
Best For: users of Bambu Lab, Ender, Neptune, or Kobra printers who want a simple, visible enclosure to improve print adhesion and reduce dust/warping.
Pros:
- Fits many popular models (A1, Ender3 V3/V2/S1 Pro, Neptune 4 Pro, Kobra2 Pro) and is easy to assemble with included hardware and clear instructions.
- Transparent acrylic panels and LED lighting provide excellent visibility for monitoring prints.
- Ventilated design helps expel smoke and dust and maintains a more constant temperature for better print quality.
Cons:
- Ventilation fan noise around 52 dB can be disruptive in small or quiet spaces.
- Size (23.6 x 23.6 x 31.5 inches) may not accommodate larger or heavily modified printers.
- Acrylic construction may scratch or show fingerprints more easily than sturdier materials.
3D Printer Enclosure with Ventilation Kit and Fume Extraction Tent (800×1000×1200mm)
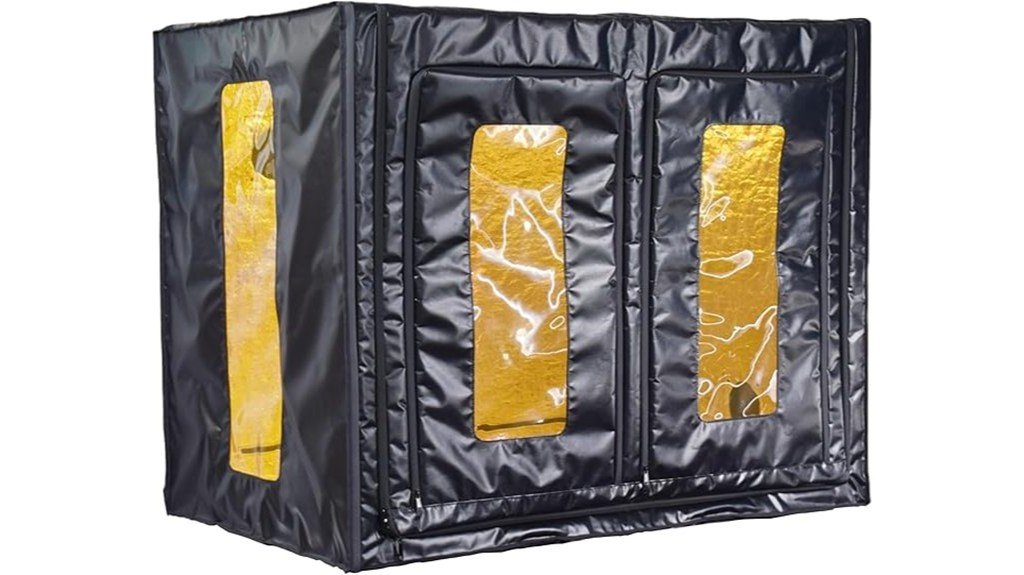
If you run a large FDM or multiple smaller printers and want cleaner air plus steadier prints, this 800×1000×1200mm enclosure is a smart pick. You’ll get a roomy tent that fits CR-10 variants, Kobra Max, Neptune 3 Max, resin printers, or multiple small FDM machines. The waterproof fabric, airtight zippers, and two 4-inch fan ports help contain and exhaust fumes, though the fan kit isn’t included. A warming layer steadies temperature to cut warping and clogging, and the dark-transparent window filters UV light. It assembles in about 15–20 minutes, reduces noise, and keeps dust and water out.
Best For: users who run large FDM printers or multiple smaller FDM/resin machines and want improved air quality, reduced print defects, and a quieter, dust- and water-protected printing area.
Pros:
- Spacious 800×1000×1200mm interior fits large printers (CR-10 series, Kobra Max, Neptune 3 Max) or multiple smaller units.
- Airtight, waterproof fabric with sealing zippers and two 4-inch fan ports enables effective fume containment and ventilation (fan kit sold separately).
- Warming layer and enclosed design stabilize ambient temperature to reduce bed warping, layer cracking, and nozzle clogging.
Cons:
- Ventilation fan kit is not included, so additional purchase and installation are required for active fume extraction.
- At 47.2 × 31.5 × 39.4 inches, it requires a large workspace (desk at least 800×1200mm) and may not fit smaller setups.
- Made of fabric—while water- and dust-resistant, it may offer less durability and structural rigidity than rigid enclosures.
Factors to Consider When Choosing 3D Printer Enclosures (2026 Buyer’s Guide)
Before you buy an enclosure, think about the size of your printer and whether the box can hold it comfortably without blocking moving parts. You’ll want to match the enclosure to how stable your printing temperatures need to be, plus check its ventilation and filtration so fumes and particles don’t become a problem. Also look for materials with safety ratings and features that cut down on noise and vibration, because those details keep prints consistent and your workspace pleasant.
Printer Size Compatibility
Picking the right enclosure size matters more than most people expect, because a snug fit keeps your printer stable, controls temperature, and makes maintenance easier. You should measure your printer and compare it to the enclosure’s internal dimensions — many list max sizes like 23″W x 22.4″D x 25.4″H. If you own a popular model, look for enclosures tailored to that size, or ones stating compatibility under specific limits such as 29.5″ x 25.6″ x 21.6″. For larger setups, choose units around 30″ x 19.7″ x 28.3″ that can hold multiple printers; some even fit two resin machines. Prefer enclosures with flexible layouts and dual-side openings, and remember ventilation and fume extraction for bigger or multi-printer arrangements.
Temperature Stability Needs
Because temperature swings can wreck a long print, you’ll want an enclosure that keeps the air around your printer steady so filament and resin behave predictably. You’ll notice fewer warped corners and cleaner layer lines when the ambient temperature stays constant, especially with PLA blends, PETG, and ABS. Pick enclosures with built-in temperature control or good insulation—those features stabilize heat and make prints more reliable. Stable temps also help layers stick together, which cuts down on clogs, jams, and failed prints that waste time. Watch for designs that minimize drafts and abrupt fluctuations; doors and seals matter more than you might think. A steady environment doesn’t guarantee perfection, but it dramatically ups your chances of finishing long, detailed jobs successfully.
Ventilation and Filtration
Good ventilation and filtration do more than keep your workspace smelling better—they protect your health and help your prints turn out right. You’ll want an enclosure with exhaust fans and carbon filter sheets to adsorb resin odors and improve air quality, especially during long prints. Good filters capture particles and reduce your exposure to gases and fumes, so you can work without worry. Look for designs with expandable discharge pipes that vent harmful gases outside, and remember that circulation also stabilizes temperature and humidity. When air moves predictably inside the box, you’ll see fewer warps and failed prints. Pick a setup that balances quiet operation, effective filtration, and easy filter replacement so maintenance stays simple and safe.
Material Safety Ratings
After you’ve sorted ventilation and filtration, it’s time to look at the materials your enclosure is made from and what their safety ratings mean for you and your prints. You’ll want fire-resistant materials like heavy-duty carbon steel or certified plastics to reduce accident risk, especially during long prints. Durable construction that resists warping under temperature swings preserves alignment and part quality. Check for dustproof seals so particles don’t mar your prints or clog mechanisms. For viewing, high-toughness PVC or acrylic windows give clear visibility and block UV without shattering. Also consider non-toxic, low-emission materials that can contain fumes — they protect your health and cut environmental impact. Read ratings and certifications, and favor enclosures with clear material specs.
Noise and Vibration Control
If you want a quieter workspace and more consistent print quality, choosing an enclosure that controls noise and vibration matters more than you might think. You’ll notice up to a 40% drop in operational noise with well-designed enclosures, which is huge if your printer sits in a shared room. Pick models built from heavy-duty carbon steel or thick panels to reduce vibrations that blur fine details. Look for soundproofing elements and dampening materials if you work in a small space—those features cut noise spillover and make long prints less distracting. Designs that stabilize the printer also protect precision by preventing wobble. Some enclosures are engineered specifically to isolate sound and vibration, so choose one that matches your noise and quality goals.
Visibility and Lighting
You’ll appreciate how controlling noise and vibration helps your prints look better and keeps the workspace calmer, but being able to actually see what’s happening inside the enclosure matters just as much. Good visibility means panoramic windows or perspective panels so you can watch prints without opening the door and losing heat. Built-in LED lighting brightens the build area and helps you spot filament jams, layer shifts, or adhesion issues fast. Material choice—acrylic or PVC—affects clarity and how well the window holds up to heat or occasional resin spills. Some designs use dark-transparent windows that double as UV filters, protecting you and sensitive prints. When shopping, prioritize clear sightlines, reliable lighting, and durable window materials for safer, more efficient printing.
Assembly and Portability
Because you’ll likely move, tweak, or store your enclosure at some point, assembly and portability matter more than they first appear. You’ll want a model with clear instructions and few parts so you can set it up in under 30 minutes; that saves time and frustration when you’re enthusiastic to print. Look for enclosures that disassemble easily or have removable panels and dual-side openings — those features make maintenance and relocation painless. Choose lightweight yet sturdy materials if you plan to move it often, but remember heavier, robust builds give better stability. Always check dimensions and weight against your space and lifting ability, especially for larger units that hold multiple printers. A little planning now prevents big headaches later.
FAQ
Do Enclosures Improve Print Quality for Flexible Filaments?
FAQs about Enclosures and Flexible Filaments:
1. How do enclosures benefit flexible filament printing?
Enclosures stabilize the temperature around the print, which helps in achieving better layer adhesion. They also minimize drafts that can lead to warping.
2. Will an enclosure eliminate all printing issues with flexible filaments?
While enclosures enhance print quality, they don’t solve all problems. Proper print settings, cooling control, and careful filament handling are still essential.
3. What specific issues do enclosures help with?
Enclosures primarily address temperature fluctuations and drafts, both of which can negatively affect the print quality of flexible filaments.
4. Do I still need to adjust print settings with an enclosure?
Yes, even with an enclosure, you must fine-tune print settings to optimize performance with flexible filaments.
5. Can an enclosure prevent warping entirely?
An enclosure reduces the likelihood of warping but does not guarantee it will never occur. Other factors like print settings also play a role.
6. Are there any downsides to using an enclosure?
Enclosures can restrict airflow, which may require careful management of part cooling to avoid overheating or poor cooling of prints.
7. Does the type of enclosure matter for flexible filament printing?
Yes, the design and insulation of the enclosure can impact its effectiveness in stabilizing temperature and reducing drafts.
8. Can I print all flexible filaments in an enclosure?
Most flexible filaments benefit from enclosures, but some may still require specific settings and environmental conditions for optimal results.
9. What is the ideal temperature for printing flexible filaments in an enclosure?
The ideal temperature varies by filament type, but maintaining a consistent ambient temperature within the enclosure is crucial for quality prints.
10. How should I handle flexible filaments when using an enclosure?
Ensure that the filament is stored properly and kept dry before printing. Handling should be gentle to avoid kinks or damage that could affect print quality.
Can I Add HEPA Filtration to These Enclosures?
FAQ on Adding HEPA Filtration to Enclosures
1. Can I add HEPA filtration to any enclosure?
Yes, HEPA filtration can be added to most enclosures, enhancing air quality and particle capture.
2. What is required for installing HEPA filtration?
Installation requires a sealed fan intake or inline filter to ensure effective filtration and airflow.
3. How do I prevent air leaks when adding HEPA filtration?
Secure airflow paths and ensure that all seals are tight to avoid leaks that could compromise filtration efficiency.
4. How often should I replace HEPA filters?
Filters should be replaced regularly, though the exact frequency depends on usage and environmental conditions.
5. What are the benefits of HEPA filtration in enclosures?
HEPA filters capture small particles effectively, improving air quality and reducing allergens and pollutants in enclosed spaces.
6. Is additional equipment needed for HEPA filtration?
You may need fans or other components to create the right airflow for the HEPA filter to function effectively.
7. Can I install HEPA filtration in existing enclosures?
Yes, most existing enclosures can be retrofitted with HEPA filtration systems with proper planning and modifications.
8. What types of enclosures are suitable for HEPA filtration?
HEPA filtration can be added to various enclosure types, including those used in laboratories, clean rooms, and industrial settings.
9. Do I need professional help to install HEPA filtration?
While some people can install the system themselves, consulting a professional can ensure optimal setup and performance.
10. Will HEPA filtration affect airflow within the enclosure?
Yes, adding HEPA filtration can impact airflow, so it’s important to design the system to maintain effective ventilation.
11. Can I use HEPA filters with other types of filtration?
Yes, HEPA filters can be used in conjunction with other filtration systems for enhanced air purification and particle removal.
Are These Enclosures Compatible With Dual-Extruder Printers?
FAQs on Enclosures for Dual-Extruder Printers
1. Are all enclosures suitable for dual-extruder printers?
No, not all enclosures are compatible. It’s important to verify that the enclosure’s internal dimensions can accommodate your dual-extruder printer.
2. What should I check regarding dimensions?
Measure your printer’s height, width, and depth, including any components like hotends and filament paths, to ensure a proper fit within the enclosure.
3. How does door access affect compatibility?
Ensure the enclosure has doors that allow easy access to both extruders for maintenance and loading filament without obstruction.
4. What is meant by cable routing?
Good cable routing is essential for keeping cables organized and preventing them from getting damaged or tangled. Check if the enclosure provides adequate openings for cables.
5. Do I need to consider ventilation?
Yes, proper ventilation is crucial for preventing overheating. Make sure the enclosure has vents or can accommodate fans for airflow.
6. How can I determine hotend clearance?
Measure the distance from the printer’s highest point, including the hotend, to ensure it won’t touch the enclosure’s ceiling when printing.
7. What if my printer has add-ons?
If your printer has additional components, measure these as well to confirm they won’t interfere with the enclosure’s fit or functionality.
8. Are there specific enclosures designed for dual-extruder printers?
Some manufacturers offer enclosures specifically designed for dual-extruder setups, which may provide better compatibility and convenience.
9. Can I modify an enclosure to fit my printer?
Depending on the enclosure’s material and structure, some modifications may be possible. However, ensure that any changes don’t compromise safety or functionality.
10. Is it worth investing in a high-quality enclosure for a dual-extruder printer?
Yes, a high-quality enclosure can enhance print quality by maintaining consistent temperatures and reducing warping, especially for difficult materials.
How Do Enclosures Affect Printer Warranty or Service Access?
FAQs on Enclosures and Printer Warranty/Service Access
1. Can an enclosure void my printer warranty?
Yes, if the enclosure modifies airflow, adds heaters, or restricts access for maintenance, it can void the warranty.
2. What modifications to my printer can lead to warranty issues?
Modifications that affect airflow, such as sealing or insulating the printer, can lead to warranty complications.
3. Are there specific terms I should check regarding enclosures?
Always review the manufacturer’s warranty terms to understand how enclosures may impact your coverage.
4. Can I make permanent alterations to my printer without affecting the warranty?
Permanent alterations are generally discouraged, as they can void your warranty. It’s best to avoid them.
5. How can I ensure my printer remains serviceable with an enclosure?
Design the enclosure to allow easy access for maintenance and repairs to ensure service technicians can work on the printer.
6. What should I consider when choosing an enclosure for my printer?
Consider airflow, heating elements, and accessibility to avoid warranty voiding and facilitate maintenance.
7. Are temporary enclosures safe for my printer’s warranty?
Temporary enclosures that do not modify the printer’s functionality or airflow may not affect the warranty, but check specific guidelines.
8. What happens if my printer needs repairs but is in an enclosure?
If the enclosure restricts access, it may delay repairs or lead to complications with warranty claims.
9. Can I contact the manufacturer for advice on enclosures?
Yes, contacting the manufacturer can provide clarity on acceptable enclosure designs that won’t affect your warranty.
10. What should I do if my printer warranty is voided due to an enclosure?
If your warranty is voided, you may need to seek third-party repair services or consider purchasing a new printer.
Can I Retrofit Heated Beds or Enclosures With Active Temperature Control?
FAQ 1: Can I retrofit my heated bed for better temperature control?
Yes, you can retrofit your heated bed with active temperature control to enhance its performance.
FAQ 2: What components do I need for retrofitting?
To retrofit, you’ll need thermostats, PID controllers, sensors, and solid-state relays (SSRs) for effective temperature management.
FAQ 3: Is calibration necessary after retrofitting?
Yes, careful calibration of your new components is essential to ensure accurate temperature readings and control.
FAQ 4: How do I ensure safety during the retrofit?
Make sure to follow proper wiring practices and safety guidelines to prevent electrical hazards during the installation of new components.
FAQ 5: Can I integrate my retrofit with existing firmware?
You may need to update or configure your firmware or controller settings to accommodate the new temperature control system.
FAQ 6: Will retrofitting improve my printing results?
Yes, active temperature control can lead to more consistent heating, which may improve print quality and adhesion.
FAQ 7: Are there specific sensors recommended for this retrofit?
Using high-quality thermistors or thermocouples is recommended for precise temperature monitoring in retrofitted systems.
FAQ 8: How difficult is the installation process?
The installation complexity can vary; basic electrical knowledge is helpful, but detailed guides or tutorials are available to assist you.
FAQ 9: What should I consider regarding power requirements?
Ensure that your power supply can handle the additional load from the new components to avoid any power-related issues.
FAQ 10: Can I retrofit enclosures with temperature control too?
Yes, enclosures can also be retrofitted with active temperature control by following similar steps and using appropriate components.
Final Thoughts
When it comes to choosing a 3D printer enclosure, you have solid options that can significantly enhance your printing experience. Selecting the right enclosure is crucial for achieving reliable prints, ensuring safety, and minimizing noise. Start by prioritizing key factors such as size, ventilation, and temperature control. These elements are non-negotiable.
Once you have those essentials in place, consider additional features like lighting, monitoring capabilities, and fume extraction systems, tailored to your specific workspace and the materials you’re using. If you’re uncertain about which model to choose, I recommend starting with a versatile and well-ventilated enclosure that fits your printer perfectly. This foundational choice will serve you well, and you can always upgrade later as your needs evolve.
Remember, safety is paramount—always be mindful of fumes and heat when operating your 3D printer. Invest in an enclosure that protects you and your workspace while elevating your printing results. Happy printing!