You’ll want an enclosure that keeps fumes and noise down, holds temperature steady, and fits your printer without fuss. I’ve found two great modular options: a roomy 800×1000×1200mm model with a ventilation kit for bigger machines, and a compact 540×540×620mm plexiglass kit that fits an IKEA Lack table. Both are easy to assemble, durable, and customizable — and one of them might change how you print at home.
3D Printer Enclosure with Ventilation Kit (800×1000×1200mm)
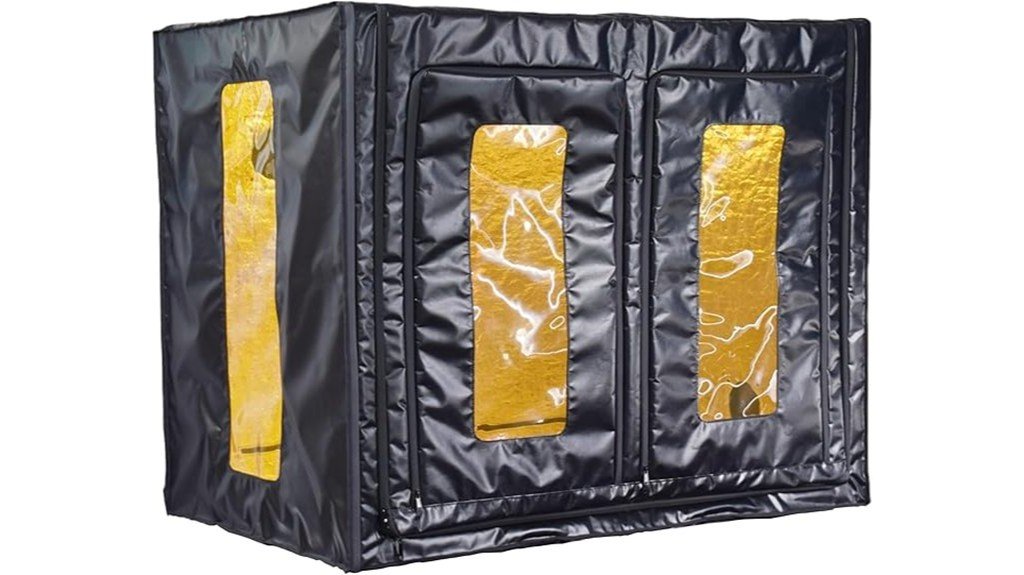
If you run large FDM or multiple small printers, this 800×1000×1200mm enclosure is built for you — think of it as a safe, tidy garage that keeps fumes, dust, and temperature swings under control. You’ll fit big machines like CR-10S5 or several small FDM and resin printers, and the dual-side openings make access easy. The waterproof fabric, airtight zippers, and ports for a 4-inch exhaust fan help trap and remove fumes, while the warming layer stabilizes temperature to cut warping and clogs. It’s light, quick to assemble, has a viewing window, and really tidies your workspace.
Best For: users who run large FDM printers or multiple small FDM/resin printers and need a compact, ventilated, dust- and fume-controlled workspace to improve print quality and organization.
Pros:
- Spacious dimensions fit large machines (CR-10S5, CR-10 Max, etc.) or several smaller printers, maximizing workshop efficiency.
- Waterproof fabric, airtight zippers, and ventilation ports enable effective fume containment and extraction when paired with a 4-inch exhaust fan.
- Enclosed warming layer and viewing window stabilize temperature to reduce warping, layer cracking, and nozzle clogs while allowing monitoring.
Cons:
- Ventilation kit (exhaust fan) is not included, so additional purchase is required for full fume extraction.
- At 47.2 × 31.5 × 39.4 inches, it requires a large desk footprint (≥800×1200mm), which may not suit small workspaces.
- Lightweight construction (16 lbs) may feel less sturdy than rigid enclosures and may need careful handling.
Universal 3D Printer Enclosure 5mm Plexiglass Kit (540x540x620mm)
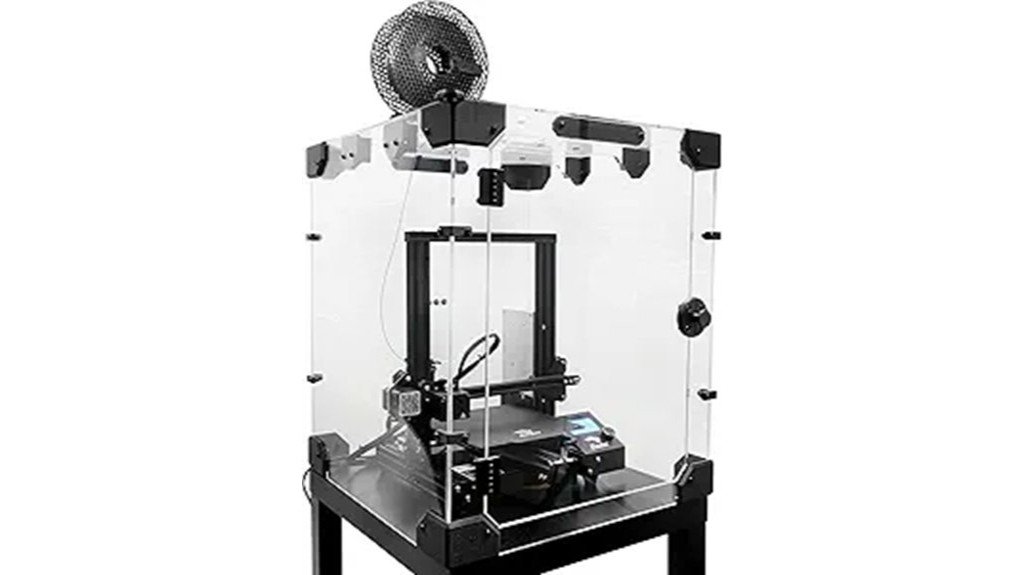
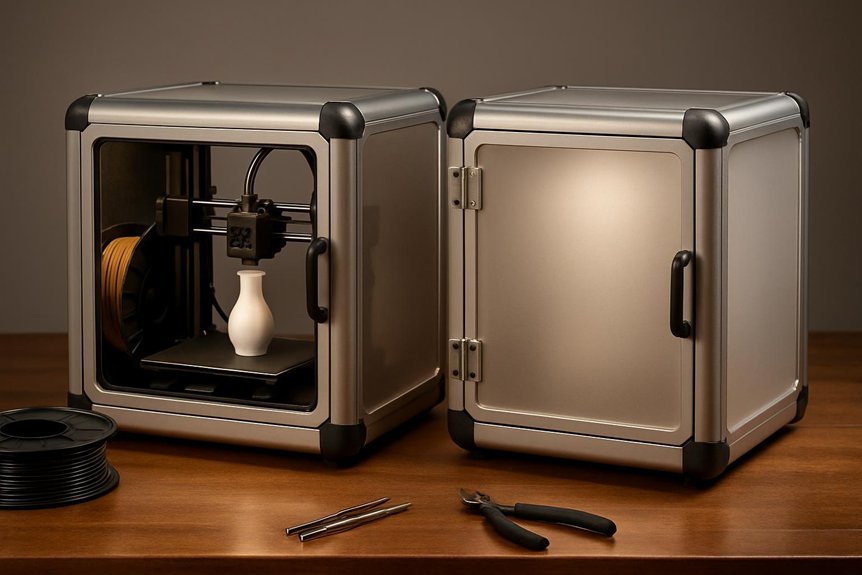
The Universal 3D Printer Enclosure 5mm Plexiglass Kit is a great choice for hobbyists and small shops who want a clean, temperature-stable workspace for printers like the Prusa MK3/MK4 or Creality Ender 3/5 Pro. You’ll get a 540x540x620mm inner volume that fits on an IKEA Lack table and keeps heat steady for ABS or PETG. The 5mm plexiglass cuts noise and holds temperature, and modular corner passthroughs let you mount power supplies or external electronics. It includes spare parts, metal hinges, bearings for spools, a hygrometer, and 36 STL files for customization. Shipment sometimes risks plexiglass damage, but support helps.
Best For: Hobbyists and small workshop users who need a temperature-stable, low-noise enclosure for FDM printers like the Prusa MK3/MK4 or Creality Ender 3/5 Pro.
Pros:
- Fits on an IKEA Lack table and provides a 540x540x620mm inner volume that maintains steady heat for ABS/PETG printing.
- 5mm plexiglass construction, included hygrometer, and modular passthroughs reduce noise and allow external electronics or power mounting.
- Comes with quality hardware (metal hinges, bearings), spare parts, and 36 STL files for customization and upgrades.
Cons:
- Plexiglass panels can be damaged during shipping; some customers reported needing replacements.
- Warranty/support exists but replacement parts availability and responsiveness can be limited.
- At 31.8 pounds and requiring assembly, it may be bulky or awkward for some users to handle and set up.
Factors to Consider When Choosing Modular 3D Printer Enclosures
When you pick a modular 3D printer enclosure, think about size and compatibility first so your printer and any filament spools fit comfortably. You’ll also want to check ventilation and filtration, temperature stability, and the material’s durability to keep prints consistent and safe. Make sure the design lets you access the printer easily for maintenance and adjustments without wrestling with panels or tools.
Size and Compatibility
Why does size matter so much for a modular 3D printer enclosure? You want an enclosure that fits your printer snugly without cramping movement or blocking access. Measure your printer’s footprint and height, then compare it to enclosure models — for example, larger setups may need something like 800mm x 1000mm x 1200mm, while common inner volumes are around 540mm x 540mm x 620mm. Check clearance recommendations; many FDM machines need at least 520mm x 520mm x 620mm to operate smoothly. Also confirm compatibility with brands you own, like PRUSA or Creality, by checking manufacturer specs. Finally, consider modular features such as corner passthroughs for external electronics, which can make a good enclosure work with customized setups.
Ventilation and Filtration
Because fumes and heat can build up quickly in a closed space, keeping your enclosure properly ventilated and filtered is one of the smartest things you can do for both safety and print quality. You’ll want airtight zippers and seals to keep odors from drifting into your room, and exhaust fan ports so you can install a ventilation kit that pulls resin fumes out fast. A filter—HEPA or activated carbon—will help clean the air before it re-enters your workspace. Use simple monitoring tools like a hygrometer and temperature readout to check that your system is working; they catch problems early and save frustration. With good ventilation and filtration, prints smell less, you breathe easier, and cleanup gets simpler.
Temperature Stability
Good ventilation and filtration keep the air healthy, but temperature control is what keeps your prints consistent and worry-free. You’ll want an enclosure that holds a steady ambient temperature, since fluctuations cause bed warping and layer cracking. Thick panels and specialized warming layers help—a fully enclosed box with 5mm plexiglass and a heater can maintain the heat high enough for ABS or other high-temp filaments. If you plan to run multiple printers, pick a design with enough internal space so heaters and circulation work evenly. In cold weather, stable warmth also improves resin flow and reduces failed pours. Aim for consistent, controllable heat rather than raw power: predictable, even temperatures give you repeatable, high-quality prints.
Material and Durability
Pick materials that match how you plan to use the enclosure, because they determine noise, temperature control, weight, and how long the box will last. If you need quieter prints and steady heat for ABS or nylon, 5mm plexiglass does a great job cutting noise and holding temperature, though it can make the unit heavy—up to about 31.8 pounds. Lighter waterproof fabric options cut weight and pack down for storage, and with good sealing they also contain odors and fumes. Look for air-tight zippers and warming layers to prevent bed warping and layer cracks. Finally, choose modular builds with quality hardware—metal ball-bearings and all-metal hinges—to guarantee the enclosure survives regular use and adjustments.
Accessibility and Maintenance
When you’re choosing a modular 3D printer enclosure, think about how easy it will be to reach everything for routine checks and repairs—quick assembly and simple access save you time and frustration. Pick enclosures that assemble and disassemble without a toolbox; you’ll thank yourself when swapping parts or rerouting cables. Dual-side openings let you work on two printers or reach the back of a machine without awkward angles. Look for corner passthroughs so power supplies, filament sensors, and control cables stay tidy and reachable. A clear viewing window helps you watch prints without opening the box and disturbing temperature or humidity. Built-in hygrometer and temperature readouts mean you can monitor conditions at a glance and keep materials printing reliably.
FAQ
Can I Paint or Customize the Enclosure Exterior?
FAQ 1: Can I paint the exterior of my enclosure?
Yes, you can paint the exterior. Just ensure you use heat-resistant and non-toxic paints.
FAQ 2: Are there specific types of paint I should use?
Opt for heat-resistant, non-toxic paints to ensure safety and performance.
FAQ 3: Will painting affect the functionality of my enclosure?
It’s important to avoid blocking any vents or sensors when customizing your enclosure.
FAQ 4: Do I need to prepare the surface before painting?
Yes, preparing the surface is essential for proper paint adhesion and finish.
FAQ 5: Should I test the paint before applying it to the enclosure?
Absolutely, always test finishes on a scrap piece before applying to the enclosure to ensure compatibility.
FAQ 6: Can I make modifications to the enclosure after painting?
Be cautious with modifications; ensure they don’t compromise fire safety or ventilation.
FAQ 7: Is there a risk of fire if I paint my enclosure?
Using appropriate, heat-resistant paint minimizes fire risk, but always prioritize fire safety in modifications.
FAQ 8: What should I avoid when customizing my enclosure?
Avoid blocking vents, sensors, or any components that could affect the enclosure’s operation.
FAQ 9: Can I customize the enclosure in ways other than painting?
Yes, you can customize in other ways, but always consider the impact on safety and functionality.
FAQ 10: Why is ventilation important when customizing the enclosure?
Ventilation is crucial for maintaining proper airflow and preventing overheating of the enclosure’s components.
Will the Enclosure Fit Dual-Extruder Printers?
1. Will the enclosure fit my dual-extruder printer?
Yes, the enclosure is compatible with many dual-extruder printers, but you must verify the interior dimensions.
2. What should I check regarding filament paths?
Ensure there’s adequate clearance for the filament paths to prevent any obstructions during printing.
3. Is there enough space for hotend movement?
Yes, but it’s essential to confirm that the enclosure allows for the full range of motion of the hotends.
4. How should I assess spool placement within the enclosure?
Check the design of the enclosure for suitable areas to place the filament spools, ensuring they are easily accessible.
5. What about ventilation in the enclosure?
Proper ventilation is crucial; make sure the enclosure has openings or fans to maintain airflow during printing.
6. Are there access panels on the enclosure?
Verify that the enclosure includes access panels for easy maintenance and monitoring of the printer during operation.
7. How do I manage cable routing in the enclosure?
Ensure the enclosure design accommodates cable management to prevent tangling or interference with moving parts.
8. Can I modify the enclosure for better fit?
While modifications may be possible, it’s best to choose an enclosure that fits your printer’s specifications from the start.
9. What’s the importance of checking dimensions?
Checking dimensions ensures that your printer operates without restrictions and maintains optimal performance.
10. Will the enclosure affect printing quality?
A well-fitted enclosure can positively impact print quality by maintaining temperature stability and reducing drafts.
How Do I Ground the Enclosure for Electrical Safety?
FAQ 1: What is the purpose of grounding an enclosure?
Grounding an enclosure prevents electrical shock hazards and ensures that any fault current is safely directed to the ground, minimizing the risk of injury or fire.
FAQ 2: How do I connect the grounding wire?
Attach a heavy-gauge copper grounding wire from the metal frame of the enclosure to a known earth ground, such as a grounding rod or the house grounding point.
FAQ 3: What type of wire should I use for grounding?
Use a heavy-gauge copper wire, as it provides the necessary conductivity and durability for effective grounding.
FAQ 4: How do I secure the grounding wire?
Secure the grounding wire using appropriate clamps that are designed to ensure a solid connection between the wire and the metal frame of the enclosure.
FAQ 5: How can I verify that my grounding is effective?
Test the continuity of the grounding connection with a multimeter to ensure that there is a proper electrical connection between the enclosure and the earth ground.
FAQ 6: What tools do I need for grounding the enclosure?
You will need a heavy-gauge copper wire, clamps for securing the wire, and a multimeter for testing continuity.
FAQ 7: Where should I connect the grounding wire?
Connect the grounding wire to a known earth ground, which can be a dedicated grounding rod or the grounding point of your electrical system in your home.
FAQ 8: What happens if the enclosure is not grounded?
If the enclosure is not grounded, there is a significant risk of electric shock or fire in the event of a fault, as there is no safe path for the electrical current to follow.
FAQ 9: How often should I check the grounding?
Regularly check the grounding connection, especially after any changes to the electrical system or if the enclosure has been moved or modified.
FAQ 10: Can I ground the enclosure to a water pipe?
While water pipes can be used as grounding points, it is generally recommended to use a dedicated grounding rod or the electrical system’s grounding point for a more reliable connection.
Can I Use Filament Dryers Inside the Enclosure?
1. Can I place a filament dryer inside my 3D printer enclosure?
Yes, you can place a filament dryer inside the enclosure, but take necessary precautions.
2. What precautions should I take when using a filament dryer in an enclosure?
Ensure there is proper ventilation to prevent moisture buildup and overheating.
3. How can I guarantee proper airflow with a filament dryer in the enclosure?
Avoid blocking airflow paths and ensure the dryer has enough space for air circulation.
4. Should I be concerned about electrical connections?
Yes, ensure that all electrical connections are secure and grounded to prevent safety hazards.
5. What temperatures should I monitor when using a filament dryer inside?
Monitor the temperatures to ensure they remain within safe limits to avoid damaging prints or electronics.
6. Can using a filament dryer affect print quality?
Improper setup or overheating from the dryer can negatively affect print quality, so take care to manage conditions.
7. Is moisture buildup a risk when using a filament dryer?
Yes, if ventilation is inadequate, moisture can accumulate, impacting both the filament and the prints.
8. How often should I check the conditions inside the enclosure with a dryer?
Regularly monitor the conditions to ensure optimal performance and prevent issues.
9. Are there specific types of filament dryers better suited for enclosures?
Look for dryers designed with safety features and effective ventilation systems for enclosure use.
10. What are the signs that my enclosure is too hot or humid?
Watch for unusual smells, condensation inside the enclosure, or failure of the prints to adhere properly, which indicates excessive heat or humidity.
Are There Noise-Reduction Upgrade Options?
1. What are acoustic foam panels?
Acoustic foam panels are sound-absorbing materials designed to reduce noise levels in a space. They can be added around your printer to help minimize sound.
2. How does mass-loaded vinyl work for noise reduction?
Mass-loaded vinyl is a dense material that blocks sound transmission. By lining the interior of your printer enclosure with it, you can significantly dampen noise.
3. What are vibration-damping feet?
Vibration-damping feet are specialized pads that absorb vibrations produced by your printer. Installing them helps to reduce noise caused by vibrations transferring to the surface it rests on.
4. What types of quieter fans can I use?
Quieter fans are designed with noise reduction in mind, often using better materials and designs to minimize sound. Replacing standard fans with these can lead to a noticeable decrease in printer noise.
5. What are silent stepper drivers?
Silent stepper drivers are electronic components that control the motors in your printer while minimizing noise. Upgrading to these drivers can significantly reduce the sound produced during operation.
6. How does closed-cell insulation help with noise?
Closed-cell insulation is a soundproofing material that can be used within printer enclosures. It helps to absorb sound and prevent vibrations from escaping.
7. Can I combine different noise-reduction treatments?
Yes, combining various treatments like acoustic foam, mass-loaded vinyl, and insulation can provide better sound reduction. This multi-faceted approach enhances overall effectiveness.
8. Will noise-reduction upgrades affect ventilation?
Properly installed noise-reduction upgrades can maintain adequate ventilation. It’s important to ensure that airflow is not entirely blocked while implementing soundproofing solutions.
9. Is temperature control compromised with noise-reduction upgrades?
No, as long as you strategically place soundproofing materials, temperature control can be maintained. Ensure that cooling components remain unobstructed for optimal printer performance.
10. How noticeable is the noise reduction after upgrades?
After implementing these upgrades, users typically report a significant decrease in printer noise. The level of noise reduction can vary based on the combination and quality of materials used.
Final Thoughts
When it comes to modular 3D printer enclosures, you have two excellent options to choose from. First, consider the large 3D Printer Enclosure (800×1000×1200mm). This is the ideal choice if you require ample space for larger printers or multiple setups. On the other hand, if you’re working with an IKEA Lack table or need a compact, quieter workspace, the Universal 5mm Plexiglass kit (540×540×620mm) is your go-to solution.
When selecting an enclosure, focus on key factors: size, ventilation, temperature control, build material, and accessibility. Each of these elements is crucial to ensure optimal printing conditions. Choose the enclosure that best suits your printer, your workspace, and your safety requirements. Make the right choice, and you’ll enhance your printing reliability and efficiency.